
Welcome to the Senville Mini Split Remote Control Manual, your guide to mastering the remote’s features, troubleshooting, and maintenance for optimal performance and comfort.
Overview of the Remote Control Features
The Senville Mini Split remote offers advanced features like voice control, automatic syncing, and customizable settings for enhanced comfort. It includes real-time analytics, LED display options, and intuitive controls for temperature adjustment. The remote also supports smart Wi-Fi connectivity and app integration, ensuring seamless operation and monitoring of your mini split system.

Importance of the Manual for Optimal Use
This manual is essential for maximizing the functionality of your Senville Mini Split remote. It provides detailed instructions for operating advanced features, troubleshooting common issues, and maintaining the system. By following the guidelines, users can ensure efficient performance, extend the product’s lifespan, and resolve issues promptly, enhancing overall comfort and energy efficiency.

Basic Functions of the Senville Mini Split Remote Control
This section covers essential operations like turning the unit on/off, adjusting temperature, and understanding the LED display, ensuring smooth operation and enhanced comfort.

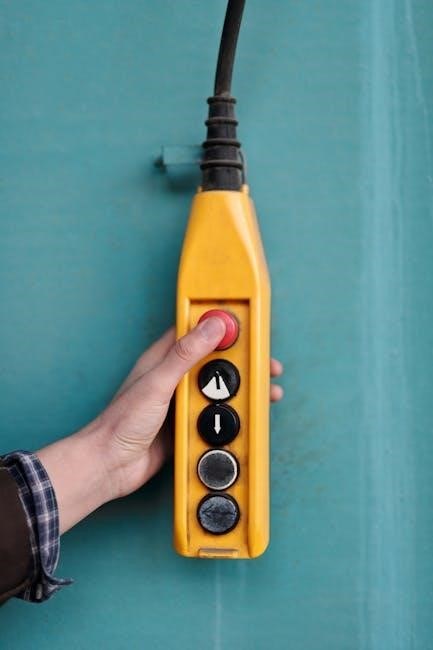
Turning the Unit On/Off
Press the power button on the remote to turn the unit on or off. Ensure the unit is properly plugged in and the remote has clear line of sight. The LED display will confirm the action. If issues arise, check for signal blockage or battery weakness. Refer to troubleshooting for further assistance.
Adjusting Temperature Settings
Use the up and down arrows on the remote to adjust the temperature. The LED display will show the selected temperature. Ensure the unit is on and the remote has a clear line of sight. The temperature range is typically between 60-90°F. Refer to the manual for detailed steps on precise adjustments.
Understanding the LED Display
The LED display on your Senville mini split remote shows the current temperature, mode, and error codes. The display will blink or show specific patterns to indicate issues. For example, a flashing light may signal a system error, while steady lights confirm settings. Always refer to the manual for decoding specific LED indicators and resolving issues promptly.
Troubleshooting Common Issues
Identify and resolve issues like remote non-response, unit malfunction, or signal blockage. Check batteries, ensure clear line-of-sight, and consult the manual for error code solutions.
Remote Control Not Responding
If the remote isn’t responding, ensure batteries are properly installed and not expired. Check for signal blockages, like obstructed line-of-sight. Reset the remote by pressing the LED button four times. Consult the manual for detailed troubleshooting steps to restore functionality and ensure smooth operation of your mini-split system.
Unit Not Turning On/Off via Remote
If the unit doesn’t turn on/off via remote, check for blocked signals or interference. Ensure the remote has clear line-of-sight to the indoor unit. Verify battery life and proper installation. Reset the remote by pressing the LED button four times. If issues persist, refer to the manual for advanced troubleshooting solutions.
Signal Blockage Causes and Solutions
Signal blockage occurs when obstacles like furniture or walls interfere with the remote’s infrared signal. Ensure clear line-of-sight between the remote and unit. Relocate the unit or remote to avoid interference. Check for nearby electronic devices emitting signals. Regularly clean the remote’s sensor and ensure proper alignment for uninterrupted operation.

Maintenance and Care Tips
Regularly clean the remote control with a soft cloth and ensure batteries are replaced when power weakens. Schedule periodic system checks to maintain efficiency and performance.
Cleaning the Remote Control
Use a soft, dry cloth to gently wipe the remote control, focusing on buttons and surfaces. Avoid harsh chemicals or moisture, which may damage internal components. Regular cleaning prevents dirt buildup, ensuring smooth operation and maintaining signal clarity. This simple maintenance step helps preserve the remote’s functionality and extends its lifespan effectively.
Battery Replacement Guidelines
Replace batteries with high-quality alkaline ones to ensure optimal performance. Open the battery compartment on the back, insert new batteries matching the polarity (+/-) signs. Avoid mixing old and new batteries. Dispose of used batteries properly. Test the remote immediately after replacement to confirm functionality. Regular checks prevent sudden operation issues.
Regular System Checks
Perform regular system checks to ensure smooth operation. Verify the remote’s signal strength, clean the infrared sensor, and test all buttons. Check for firmware updates and sync the remote with the unit. Inspect battery levels and replace them as needed. Schedule annual professional maintenance for the mini split system to maintain efficiency and extend lifespan.

Advanced Features and Customization
Explore advanced features like voice control, customizable settings, and real-time analytics. Integrate with smart devices and apps for enhanced convenience and personalized comfort solutions.
Setting Up Voice Control
To enable voice control, link your Senville mini split system with a compatible smart speaker or app. Ensure the unit is connected to Wi-Fi and follow the app’s instructions to sync. This allows seamless voice commands for temperature, fan speed, and mode adjustments, enhancing convenience and modernizing your climate control experience.
Customizable Settings for Comfort
The Senville remote allows you to tailor settings for personalized comfort. Adjust temperature, fan speed, and operation modes to suit preferences. Program schedules, set energy-saving modes, and customize cooling or heating profiles. These features ensure optimal comfort while maintaining energy efficiency, allowing you to create a perfect environment with ease and precision.
Real-Time Analytics and Monitoring
Monitor your mini split’s performance in real-time using the remote’s advanced features. Track temperature, humidity, and energy consumption through the intuitive interface. Receive notifications for system status updates and maintenance reminders. This data helps optimize energy use and ensures consistent comfort, providing insights to improve overall system efficiency and longevity effectively.

Synchronization and Connectivity
Synchronization and Connectivity ensure your remote operates seamlessly with the mini split. Sync the remote, connect to Wi-Fi modules, and access controls via the Senville app for enhanced functionality.
How to Sync the Remote with the Unit
To sync the remote with your Senville mini split, ensure both devices are powered on. Press and hold the SYNC button on the remote for 3-5 seconds until the LED blinks. Release and wait for confirmation. If unsuccessful, restart the unit and retry the syncing process for proper connectivity.
Connecting to Smart Wi-Fi Modules
Ensure your Senville mini split is powered on and download the Senville app. Open the app, select “Add Device,” and follow in-app prompts. Enter your Wi-Fi password and wait for confirmation. The LED on the unit will blink when connected. This enables remote access and voice control via smart devices.
Using the Senville App for Remote Access
Download and install the Senville app to control your mini split remotely. Once connected, you can adjust temperature, schedule settings, and monitor performance in real-time. The app offers voice control integration and customizable comfort options. Ensure your unit is linked to a smart Wi-Fi module for seamless functionality; Check compatibility with your model for optimal results.

Understanding LED Indicators and Error Codes
This section explains how to interpret LED indicators and error codes on your Senville Mini Split remote control for effective troubleshooting and maintenance.
Decoding LED Blinking Patterns
The LED on your Senville Mini Split remote flashes in specific patterns to indicate system status or errors. Two blinks may signal communication issues, while three blinks could indicate sensor malfunctions. Continuous flashing might point to internal system errors. Refer to the manual for a detailed guide to decoding these patterns and resolving issues effectively.

Common Error Codes and Solutions
Common error codes like E1, E2, or E3 often indicate issues with sensors or internal components. Check and clean sensors, ensure proper installation, and restart the unit. For persistent errors, refer to the manual or contact customer support for detailed troubleshooting and repair guidance to restore optimal functionality.
Resetting the Remote Control
To reset the remote control, press and hold the LED button four times or the MANUAL CONTROL button three times. This process resets settings to default and clears error codes. Ensure the remote is pointed at the unit during the reset. After resetting, power cycle the unit to confirm proper functionality.
Remote Control Range and Interference
The remote control’s range may be affected by physical obstructions like curtains or doors, which can block signals. Ensure a clear line of sight for optimal performance.
Optimizing Signal Strength
Ensure a clear line of sight between the remote and the indoor unit to maintain strong signal strength. Avoid obstructions like curtains, doors, or furniture. Mounting the unit at an optimal height and keeping the remote away from electronic devices can improve connectivity. Regularly check for physical barriers and reset the remote if necessary.
Identifying Sources of Interference
Identify sources of interference such as physical obstructions like curtains, doors, or furniture blocking the remote’s signal. Electronic devices emitting similar frequencies can also disrupt communication. Ensure the remote is not exposed to direct sunlight or extreme temperatures, as this can weaken signal strength and affect performance.
Extending the Remote Control Range
To extend the remote control range, ensure a clear line-of-sight between the remote and the unit. Minimize physical obstructions like walls or furniture. Consider using signal boosters or relocating the unit to improve reception. Regularly clean the remote’s infrared sensor and ensure batteries are fresh for optimal performance.
By following this manual, you’ll optimize your Senville Mini Split’s performance. Regular maintenance, proper battery care, and referencing this guide ensure longevity and efficiency. Store the manual securely for future needs and contact customer support for additional assistance.
Maximizing Efficiency with Proper Use
Using the Senville Mini Split remote effectively enhances energy savings and comfort. Adjust settings according to room size, ensure unobstructed signal paths, and use programmable features to maintain optimal temperatures. Regular system checks and timely battery replacements prevent malfunctions, ensuring smooth operation year-round for peak efficiency and performance.
Storing the Manual for Future Reference
Keep the Senville Mini Split Remote Control Manual in a dry, accessible location to ensure quick access for troubleshooting or operation guidance. Regularly review the manual to familiarize yourself with advanced features and optimal usage tips, ensuring long-term efficiency and convenience for maintaining your air conditioning system effectively.
Customer Support and Additional Resources
For further assistance, contact Senville’s customer support via phone, email, or their official website. Additional resources, including video guides and FAQs, are available online to enhance your understanding. The Senville app and user forums also provide valuable insights and troubleshooting tips, ensuring comprehensive support for your mini split system.
Leave a Reply