Honeywell TH6320R1004 Installation Manual: A Comprehensive Guide
This guide details the installation of the Honeywell TH6320R1004 FocusPRO 6000 thermostat, covering wiring, mounting, setup, and programming for optimal home comfort control.
Understanding the Honeywell TH6320R1004
The Honeywell TH6320R1004 is a wireless, programmable thermostat designed for both heating and cooling systems, offering precise comfort control and energy savings. As part of the FocusPRO 6000 series, it features a simple, pull-out instruction manual for easy guidance.
This model utilizes RedLINK wireless technology, enabling communication with compatible Honeywell systems. It supports 5-1-1 day scheduling, allowing customized temperature setbacks for different times and days. The thermostat is battery-powered, simplifying installation, and is available in Premier White.
Understanding its capabilities and compatibility is crucial before beginning installation. Always refer to the official product documentation for precise specifications and safety information.
Key Features of the FocusPRO 6000
The Honeywell FocusPRO 6000, including the TH6320R1004 model, boasts several key features enhancing home comfort and efficiency. Its 5-1-1 day programmable scheduling allows for tailored temperature settings, optimizing energy use. RedLINK wireless technology simplifies installation and connectivity with compatible systems, eliminating the need for new wiring in many cases.
Precise comfort control maintains consistent temperatures, while the intuitive interface ensures easy operation. Battery power offers flexibility and avoids reliance on a common “C-wire”. The thermostat supports both heating and cooling systems, and provides built-in instructions for straightforward setup.
Package Contents Verification
Upon receiving your Honeywell TH6320R1004 FocusPRO 6000, carefully verify all components are present. The package should include the thermostat unit itself, a backplate for wall mounting, mounting screws and anchors for secure installation, and a detailed installation manual providing step-by-step guidance.
Confirm the presence of wire labels to aid in identifying existing wiring during installation. While some kits may include a wireless receiver, ensure its inclusion if your system requires RedLINK connectivity. Inspect all items for any shipping damage before proceeding. A complete package ensures a smooth and trouble-free installation process.
Installation Preparation
Before starting, ensure power is off at the breaker. Verify system compatibility and gather necessary tools for a safe and efficient Honeywell TH6320R1004 installation.
Safety Precautions
Prioritize safety during installation! Always disconnect power to your heating and cooling system at the breaker box before beginning any wiring work. This prevents electrical shock and potential damage to the thermostat or HVAC equipment. Verify the power is off with a non-contact voltage tester.
If you are uncomfortable working with electrical wiring, consult a qualified HVAC technician. Improper wiring can lead to system malfunction or hazardous conditions. Wear appropriate safety glasses to protect your eyes from debris. Be mindful of potential pinch points when handling tools and the thermostat itself.
Follow all local electrical codes and regulations. Ensure the installation area is dry and free from obstructions. Read and understand all instructions in this manual before proceeding. Failure to adhere to these precautions could result in personal injury or property damage.
Tools Required for Installation
Successful installation requires specific tools. You’ll need a Phillips head screwdriver for mounting the thermostat and accessing wiring connections. A flathead screwdriver may be useful for certain terminal screws. A wire stripper/cutter is essential for preparing wires for connection, ensuring clean and secure terminations.

A non-contact voltage tester is crucial for verifying power is off before working with wiring. A level ensures the thermostat is mounted straight for accurate readings and a professional appearance. Pliers can assist with bending or manipulating wires.
Optional, but helpful tools include a drill with appropriate bits for wall mounting, and a pencil for marking screw locations. Having these tools readily available streamlines the installation process.
System Compatibility Check
Before installation, verify system compatibility. The Honeywell TH6320R1004 works with most 24V heating and cooling systems, including furnaces, heat pumps, and air conditioners. It’s crucial to confirm your system’s voltage; higher voltages can damage the thermostat.
Check for a common (C-wire) – this is often required for reliable power. If a C-wire isn’t present, adapter kits are available (discussed later). Ensure your system isn’t a line voltage system (120V/240V), as this thermostat isn’t compatible.
Confirm your system type (heating only, cooling only, or both) to configure the thermostat correctly. Compatibility with zone control systems should also be verified.

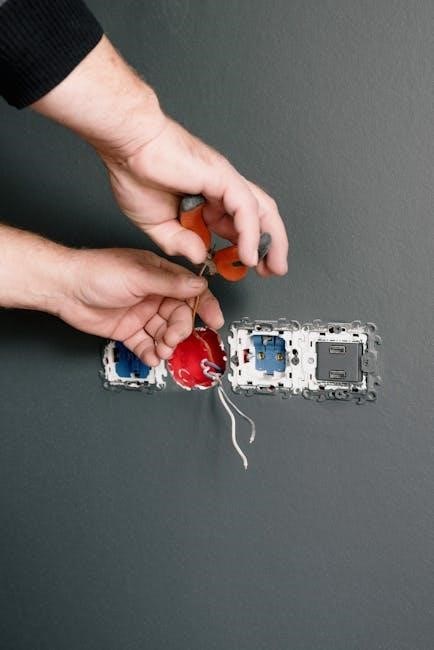
Wiring the Thermostat
Proper wiring is essential for correct operation. Carefully identify existing wires and connect them to the corresponding terminals on the thermostat’s backplate, following diagrams.
Identifying Existing Wiring
Before connecting the Honeywell TH6320R1004, carefully identify all existing wires connected to your old thermostat. Turn off power to your HVAC system at the breaker to ensure safety. Label each wire with the corresponding terminal designation from your previous thermostat – typically letters like R, W, Y, G, and C.
Take a clear photograph of the existing wiring as a reference point during installation. Common wire colors aren’t always consistent, so relying on labels is crucial. The ‘R’ wire provides power, ‘W’ activates heating, ‘Y’ activates cooling, and ‘G’ controls the fan.
A ‘C’ wire (common wire) is often required for the TH6320R1004 to provide continuous power. If you don’t have a C-wire, alternative solutions will be discussed later in this manual.
Connecting the Wires – Detailed Diagram
Refer to the wiring diagram included with your Honeywell TH6320R1004 thermostat and carefully connect the labeled wires to the corresponding terminals on the backplate. Ensure each wire is securely inserted into the terminal block – a loose connection can cause system malfunctions.
Typically, ‘R’ connects to ‘Rh’ or ‘Rc’, ‘W’ to ‘W’, ‘Y’ to ‘Y’, ‘G’ to ‘G’, and ‘C’ to ‘C’. If you have separate ‘Rh’ and ‘Rc’ terminals, use the jumper wire provided to connect them. Double-check all connections against your photograph and the diagram.
Gently tug on each wire to confirm it’s firmly held in place. Incorrect wiring can damage your HVAC system, so accuracy is paramount.
C-Wire Requirement and Solutions
The Honeywell TH6320R1004 often requires a ‘C’ (common) wire for consistent power. Many older systems lack this wire, causing compatibility issues. If a ‘C’ wire isn’t present, several solutions exist.
A ‘C’ wire adapter kit can repurpose existing wires to provide the necessary power. Alternatively, you may be able to utilize an unused wire in your existing thermostat cable. Carefully follow the adapter kit’s instructions, as incorrect installation can damage your HVAC system.
If unsure, consult a qualified HVAC technician to determine the best solution for your specific setup. A professional can safely install a ‘C’ wire or recommend a compatible adapter.
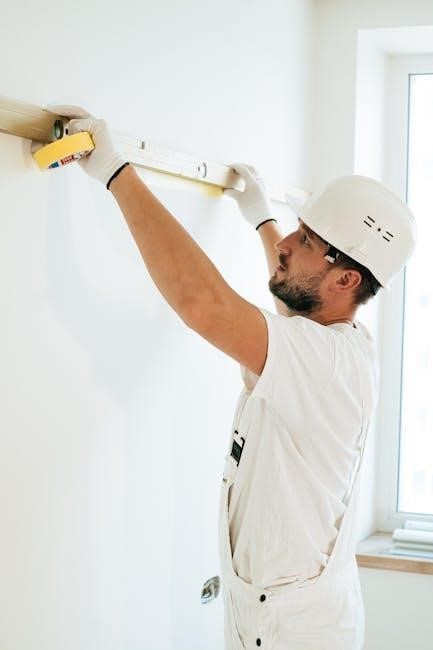
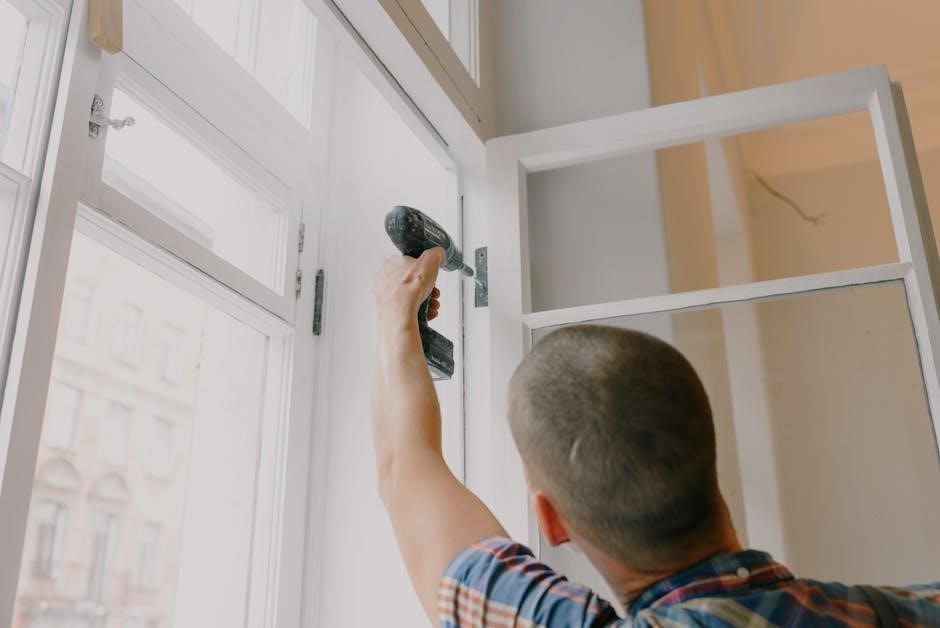
Mounting the Thermostat
Securely mounting the thermostat is crucial for proper operation. This section details the process of attaching the backplate and thermostat body to the wall.
Wall Mounting Procedure
Before beginning, ensure power to the HVAC system is completely shut off at the breaker. Carefully remove the existing thermostat baseplate, noting the wire connections. Use the provided mounting screws to attach the new Honeywell TH6320R1004 backplate to the wall, ensuring it’s level for accurate temperature readings.
Utilize a drill if necessary, but avoid over-tightening the screws. The backplate should sit flush against the wall. If existing holes don’t align, use the provided anchors for secure installation. Route the thermostat wires through the opening in the backplate. Double-check wire placement before proceeding. A properly mounted backplate is fundamental for a stable and functional thermostat installation.
Securing the Backplate
Once positioned, firmly secure the Honeywell TH6320R1004 backplate to the wall using the provided screws. Ensure the screws are tightened sufficiently to prevent movement, but avoid over-tightening, which could damage the wall or the backplate itself. Verify the backplate remains level after tightening – a level installation is crucial for accurate temperature sensing.
If mounting to drywall without existing screw holes, utilize the included wall anchors for a secure hold; Push the anchors firmly into the drywall before inserting the screws. Double-check that all wires are neatly tucked into the backplate’s opening, preventing pinching or damage during thermostat attachment.
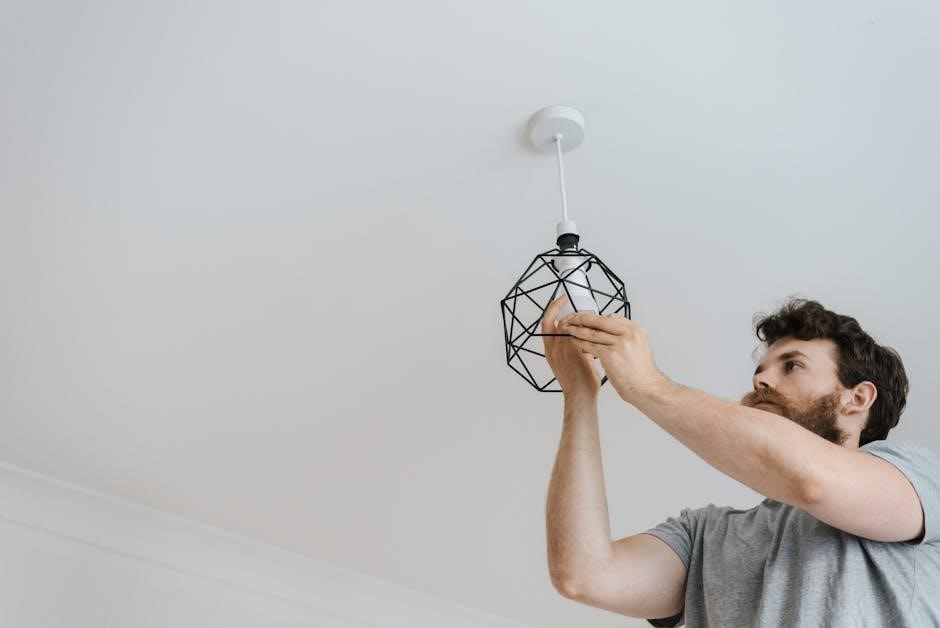
Attaching the Thermostat Body
Carefully align the Honeywell TH6320R1004 thermostat body with the secured backplate. Gently push the thermostat onto the backplate until it clicks firmly into place, ensuring a secure connection. Do not force it; if resistance is felt, re-check the alignment. Verify that all wires remain neatly tucked within the backplate and are not pinched during attachment.
Once attached, lightly tug on the thermostat body to confirm it’s securely fastened to the backplate. A loose connection can lead to inaccurate readings or operational issues. The thermostat should sit flush against the wall, indicating a proper installation.
Initial Setup and Programming
Power on the thermostat and follow the on-screen prompts to set the correct date, time, and system type for personalized heating and cooling control.
Powering On the Thermostat
After completing the wiring and mounting procedures, the Honeywell TH6320R1004 thermostat is ready for initial power-up. Ensure the power switch to your HVAC system is in the ‘on’ position. The thermostat will automatically begin to power on when it detects a consistent power supply, typically through the C-wire connection.
Upon powering on, the thermostat display will illuminate, initiating a self-test sequence. This process verifies the functionality of the internal components; The screen will then prompt you to begin the setup process, guiding you through essential configurations like date, time, and system type. If the thermostat does not power on, double-check the wiring connections and the HVAC system’s power supply.
Setting the Date and Time
Following the thermostat’s power-up sequence, accurately setting the date and time is crucial for proper scheduling and operation. The Honeywell TH6320R1004 will guide you through this process via its on-screen menu. Use the navigation buttons to adjust the month, day, and year, confirming each selection.
Next, set the current time, ensuring you correctly indicate AM or PM. Accurate timekeeping is essential for the 5-1-1 day scheduling feature to function as intended; Incorrect date or time settings can lead to inaccurate temperature control and scheduling conflicts. Double-check your entries before finalizing to guarantee optimal performance.
Configuring System Type (Heating/Cooling)
Accurate system type configuration is vital for the Honeywell TH6320R1004 to operate correctly. Access the settings menu and locate the “System Type” option. The thermostat supports various configurations, including heating only, cooling only, and both heating and cooling. Carefully select the option that matches your home’s HVAC system.
Incorrect selection can result in the thermostat attempting to cool when heat is needed, or vice versa. If you have a heat pump, a specific heat pump setting is available. Confirm your choice, as changing this setting later may require revisiting other configuration options. Proper setup ensures efficient and comfortable climate control.

Programming the Schedule
Customize your comfort with the 5-1-1 day scheduling, setting different temperatures for weekdays, weekends, and wake/sleep times for energy savings.
Understanding 5-1-1 Day Scheduling
The Honeywell TH6320R1004 utilizes a 5-1-1 day scheduling system, offering a balance between convenience and energy efficiency. This means you program five weekdays as one group, Saturday as another, and Sunday as the final, separate day. This allows for consistent temperature settings during the work week, distinct settings for Saturday activities, and unique settings for Sunday relaxation.
Within each day, you can define up to four periods: Wake, Leave, Return, and Sleep. Each period allows you to set a specific temperature. The thermostat seamlessly transitions between these programmed temperatures, optimizing comfort and reducing energy consumption. Understanding this structure is key to maximizing the benefits of your FocusPRO 6000 thermostat.
Setting Temperature Setbacks
Temperature setbacks are crucial for energy savings with the Honeywell TH6320R1004. During periods when your home is unoccupied or when you’re asleep, lowering the heating temperature in winter or raising the cooling temperature in summer significantly reduces energy usage. The FocusPRO 6000 allows easy programming of these setbacks within each daily period (Wake, Leave, Return, Sleep).
For example, setting a lower temperature during “Leave” and “Sleep” can yield substantial savings. Experiment with different setback temperatures to find a balance between comfort and efficiency. Remember, even a few degrees of setback can make a noticeable difference on your energy bill.
Creating Custom Schedules
The Honeywell TH6320R1004’s strength lies in its customizable scheduling capabilities. While the 5-1-1 day schedule provides a solid foundation, you can tailor it to your unique lifestyle. Access the programming mode to adjust temperature settings for each period – Wake, Leave, Return, and Sleep – on weekdays, Saturday, and Sunday individually.
Consider varying schedules based on work hours, family activities, or travel plans. The thermostat remembers your settings, automatically adjusting temperatures for optimal comfort and energy efficiency. Don’t hesitate to experiment to find the perfect schedule that suits your needs and maximizes savings.
Wireless Connectivity (RedLINK)
The TH6320R1004 utilizes Honeywell’s RedLINK wireless technology, enabling seamless communication with compatible systems for convenient remote control and monitoring capabilities.
Pairing with RedLINK Enabled Systems
Establishing a RedLINK connection is crucial for utilizing the wireless features of your Honeywell TH6320R1004 thermostat. Begin by ensuring your RedLINK-enabled system is powered on and in pairing mode – consult your system’s documentation for specific instructions. On the thermostat, navigate to the RedLINK pairing menu, typically found within the settings or installer options.
The thermostat will initiate a search for available RedLINK devices. Once your system appears in the list, select it to begin the pairing process. A successful pairing is usually indicated by a confirmation message on the thermostat display. If pairing fails, verify both devices are within range and that no interference is present. Repeat the process if necessary, ensuring both devices remain in pairing mode throughout the attempt.
Troubleshooting Wireless Connection Issues
If your Honeywell TH6320R1004 experiences RedLINK connectivity problems, several steps can resolve the issue. First, confirm both the thermostat and the connected system are within the specified RedLINK range. Interference from other wireless devices, like routers or microwaves, can disrupt the signal; try relocating devices.
Ensure no metal obstructions block the wireless path. If the connection remains unstable, attempt to re-pair the devices, following the pairing instructions carefully. Check the batteries in the thermostat, as low power can affect wireless performance. Finally, a factory reset of both the thermostat and the system might be necessary as a last resort, restoring them to their original pairing state.
RedLINK Range and Interference
The Honeywell TH6320R1004 utilizes RedLINK wireless technology, offering reliable communication. However, its effective range is approximately 30-50 feet indoors, potentially less depending on building materials. Walls, floors, and metal objects significantly reduce the signal strength.
Common sources of interference include Wi-Fi routers, cordless phones, microwaves, and Bluetooth devices. To minimize disruption, position the thermostat and connected system away from these sources. Experiment with relocating devices to find optimal placement. Understanding these limitations and potential interference sources is crucial for a stable and consistent wireless connection, ensuring proper thermostat operation.

Advanced Features & Troubleshooting
Explore override functions, factory resets, and error code solutions for the TH6320R1004. This section provides guidance for resolving common issues and maximizing thermostat functionality.
Using the Override Function
The Honeywell TH6320R1004’s override function allows temporary adjustments to the programmed schedule without permanently altering it. This is useful for unexpected changes in occupancy or comfort preferences. To activate the override, simply adjust the setpoint temperature up or down using the thermostat’s controls.
The system will maintain this new temperature for a specified duration, typically until the next scheduled program change. The display will indicate that the override is active, often with a specific icon or message. After the override period ends, the thermostat automatically reverts to the original programmed schedule. Understanding the duration setting for overrides is crucial for effective temperature management. Refer to the owner’s manual for detailed instructions on customizing override durations.
Resetting the Thermostat to Factory Defaults
Resetting your Honeywell TH6320R1004 to factory defaults clears all personalized settings, returning the thermostat to its original, out-of-the-box configuration. This is helpful for troubleshooting, preparing the thermostat for a new user, or resolving persistent software issues. The reset procedure typically involves accessing a hidden menu within the thermostat’s settings.
Consult the product owner’s manual for the precise sequence of button presses required, as it can vary. Be aware that a factory reset will erase your programmed schedule, temperature preferences, and any wireless network connections. After the reset, you’ll need to reconfigure the thermostat from scratch, including setting the date, time, and system type.
Common Error Codes and Solutions
The Honeywell TH6320R1004 may display error codes indicating specific issues with your heating or cooling system. These codes help diagnose problems quickly. A “C-Wire” error signifies a missing common wire, often solvable with a C-wire adapter. Other codes might relate to sensor failures, communication errors with the HVAC system, or incorrect wiring.
Refer to the detailed troubleshooting section within the official installation manual or the Resideo website for a comprehensive list of error codes and their corresponding solutions. Common fixes include checking wire connections, verifying power supply, and ensuring system compatibility. If an error persists, contacting a qualified HVAC technician is recommended.
Manuals and Resources
Access comprehensive support for your Honeywell TH6320R1004, including the installation manual, owner’s guide, and warranty details, readily available online from Resideo.
Accessing the Online Installation Manual
Finding the official Honeywell TH6320R1004 installation manual online is straightforward. A digital copy is readily available through the Resideo website (formerly Honeywell Home). This online resource provides a detailed, downloadable PDF version of the guide, ensuring you have the most up-to-date instructions at your fingertips.
Simply search for “Honeywell TH6320R1004 manual” on the Resideo support site. The manual covers all aspects of installation, from wiring diagrams to programming instructions. Having the digital version allows for easy printing of specific sections or viewing on a tablet or smartphone during the installation process. Ensure you are downloading from the official Resideo website to guarantee the accuracy and completeness of the information.
Downloading the Product Owner’s Manual
The Honeywell TH6320R1004 Product Owner’s Manual is easily accessible online, offering comprehensive guidance beyond the initial installation. This manual details everyday operation, programming features, and troubleshooting tips for your FocusPRO 6000 thermostat.
You can download the PDF version directly from the Resideo website (formerly Honeywell Home) support section. Searching for “Honeywell TH6320R1004 owner’s manual” will lead you to the correct resource. This document explains how to utilize all the thermostat’s functions, including scheduling, override settings, and understanding display messages. Keeping a copy handy ensures convenient access to information for years to come.
Warranty Information and Registration
Honeywell offers a warranty on the TH6320R1004 FocusPRO 6000 thermostat, providing peace of mind against manufacturing defects. Specific warranty terms and duration are detailed in the Product Owner’s Manual and on the Resideo (Honeywell Home) website.
Registering your thermostat is crucial to activate the warranty and receive important product updates or recall notifications. You can typically register online through the Resideo website using your purchase information. Retain your proof of purchase, as it may be required for warranty claims. Understanding the warranty coverage ensures you’re protected should any issues arise with your new thermostat.
Leave a Reply